")


Front brak pads replacement Peugeot 307

Follow this tutorial to replace the brake pads on your Peugeot 307 2.0 Hdi. 2003 / 2009
The operation is simple but requires a few basic tools. Brake pads should be replaced every 30,000 kilometres.
Difficulty :

Step :
12
Time :
Cost :
25€
- PEUGEOT 307 3/5 portes (3A/C) (Année de construction 10.2003 – 11.2007, 136 – 177 CH, Diesel, Essence)
- PEUGEOT 307 SW (3H) (Année de construction 02.2004 – 04.2008, 136 CH, Diesel)
- PEUGEOT 307 CC (3B) (Année de construction 10.2003 – 04.2009, 136 – 177 CH, Diesel, Essence)
- PEUGEOT 307 Break (3E) (Année de construction 02.2004 – 04.2008, 136 – 177 CH, Diesel, Essence)
- PEUGEOT 207 3/5 portes (Année de construction 02.2007 – 12.2012, 174 CH, Essence)
- PEUGEOT 308 I 3/5 portes (4A, 4C) (Année de construction 09.2007 – 10.2014, 136 – 174 CH, Diesel, Essence)
- PEUGEOT 207 SW (Année de construction 02.2007 – 12.2012, 174 CH, Essence)
- PEUGEOT 308 I SW (4E, 4H) (Année de construction 09.2007 – 10.2014, 136 – 174 CH, Diesel, Essence, Essence / éthanol)
- PEUGEOT 308 I CC (4B) (Année de construction 04.2009 – 12.2014, 136 – 163 CH, Diesel, Essence)
- PEUGEOT 3008 I (0U_) (Année de construction 06.2009 – 08.2016, 120 – 165 CH, Diesel, Essence)
- PEUGEOT RCZ Coupe (Année de construction 03.2010 – 12.2015, 150 – 163 CH, Diesel, Essence)
- PEUGEOT 208 I 3/5 portes (CA_, CC_) (Année de construction 03.2012 – …, 68 – 208 CH, Diesel, Essence, Essence / gaz combustible liquéfié (GPL))
- PEUGEOT 208 Van (CR_) (Année de construction 10.2012 – …, 68 – 102 CH, Diesel, Essence)
- PEUGEOT 308 SW I Van / Break (4E_) (Année de construction 01.2008 – 12.2011, 136 CH, Diesel)
- PEUGEOT 307 SW Van / Break (3E_, 3H_) (Année de construction 04.2004 – 11.2007, 136 CH, Diesel)
- PEUGEOT 208 II 3/5 portes (UB_, UP_, UW_, UJ_) (Année de construction 06.2019 – …, 131 CH, Essence)
- Brake pads 307 : https://amzn.to/3LKXeuA
- Brake Disk : https://amzn.to/3BE2P1k
- Metal brush : https://amzn.to/3v3nBpD
- Hex key : https://amzn.to/34PD2Y2
- Frein filet : https://amzn.to/3lTZTnO
- Repousse Piston : https://amzn.to/3gi5i6O
- Torque wrench : https://amzn.to/3cB5g7i
- Cooper Grease : https://amzn.to/2Z601Zv
- Jack Stand 2 et 3T : https://amzn.to/2VWsQ85
- Jack : https://amzn.to/3lPdaxA
- Mechanic kit : https://amzn.to/2Ihy7Ug
- Brake cleaner : https://amzn.to/3gdMR3c
- WD 40: https://amzn.to/30ty8KX
- Paper : https://amzn.to/3fVX7wb
- Soap : https://amzn.to/2ybB4Ro
Click to find parts & tools necessary for the work.

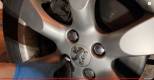
Step 1 : Remove the wheels.


-Start by removing the wheel by unblocking the 4 bolts.
You don’t have to remove the bolts, just untight them.
– Raise your vehicle until the wheel no longer touches the ground using a jack.
-Then place jack stand under the vehicle0
-Remove the bolts completely, then remove the wheel.
If it’s stuck, hit it on the tire to dislodge it.
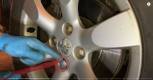
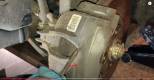
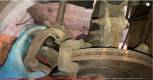
Step 2 : Remove the caliper 1/3.


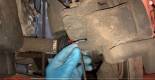
-Turn the wheels to get a work easier.
-Remove the caliper by removing the 2 fixations.
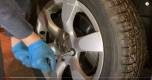
Step 3 : Remove the caliper 2/3.


![]()
![]()
-Remove the two fixing screws using an hex key.
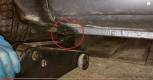
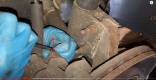
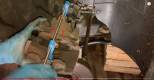
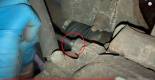
Step 4 : Remove the fixing spring.

–Think to remove the spring with a screwdriver.
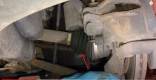
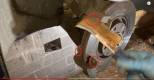
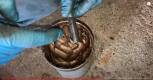
Step 5 : Push the piston.


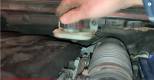
Step 6 : Remove the caliper 3/3.
Open the brake fluid reservoir then, using a flat screwdriver, lever the piston to retract it as far as possible.
This will make it easier to release the caliper.

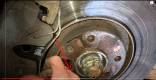
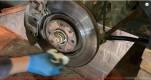
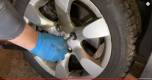
Step 7 : Remove the brake pads.
You can now remove the caliper.
When removing, be careful not to stress the brake hoses. It could damage them.


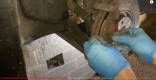
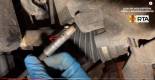
Step 8 : Push the piston.
Remove the pads then clean the pad supports with a wire brush.

Step 9 : Install new brake pads.
– Push back the plunger.
For this, the use of a piston pusher or clamp is strongly recommended.
It allows the new thicker pads to be mounted by pushing back the caliper piston.
Position the tool in the caliper and apply pressure to the pistons. You have to push them back as much as possible.


Step 10 : Install the caliper.
Once the piston is pushed back, put the new pads in the caliper.


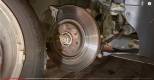
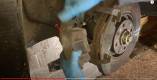
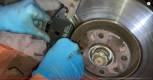
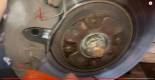
Step 11 : Clean the brake disk.
-Install the caliper again.
-You can apply copper grease to the sliders then slide the sliders into their slots.
Once the sliders are tight, remember to refit the brake caliper springs.
The pads are now mounted on the caliper.


Step 12 : Install the wheels.
-Clean the disk with some brake cleaner.


– Refit the wheel and its nuts.
-Remove the stands and the jack then tighten the wheel bolts with the torque wrench.
Do not forget to pump the brake pedal before starting to approach the pads on the disc.
You can check the assembly by testing the brakes carefully.
Vous avez besoin d’informations complémentaires ? Nous vous offrons un code réduction de 5% chez notre partenaire RTA, Revue technique Auto & Moto. Pour en profiter ? Rendez vous en cliquant ICI ! N’oubliez pas de renseigner le CODE : LEHANGARDUNORD pour vos 5% de remise !